Homemade Chicken Broth Recipe: Rich, Flavorful & Easy to Make
Have you ever wondered why restaurant soups taste so much better than homemade versions? The secret often lies in one fundamental element: a properly made chicken broth. While store-bought options offer convenience, they simply can’t match the depth, richness, and nutritional benefits of a homemade chicken broth recipe.
Creating your own chicken broth isn’t just about enhancing flavor it’s about transforming kitchen scraps into liquid gold that can elevate countless dishes. This chicken broth recipe will walk you through the simple yet rewarding process of making this culinary essential from scratch.
Ingredients List
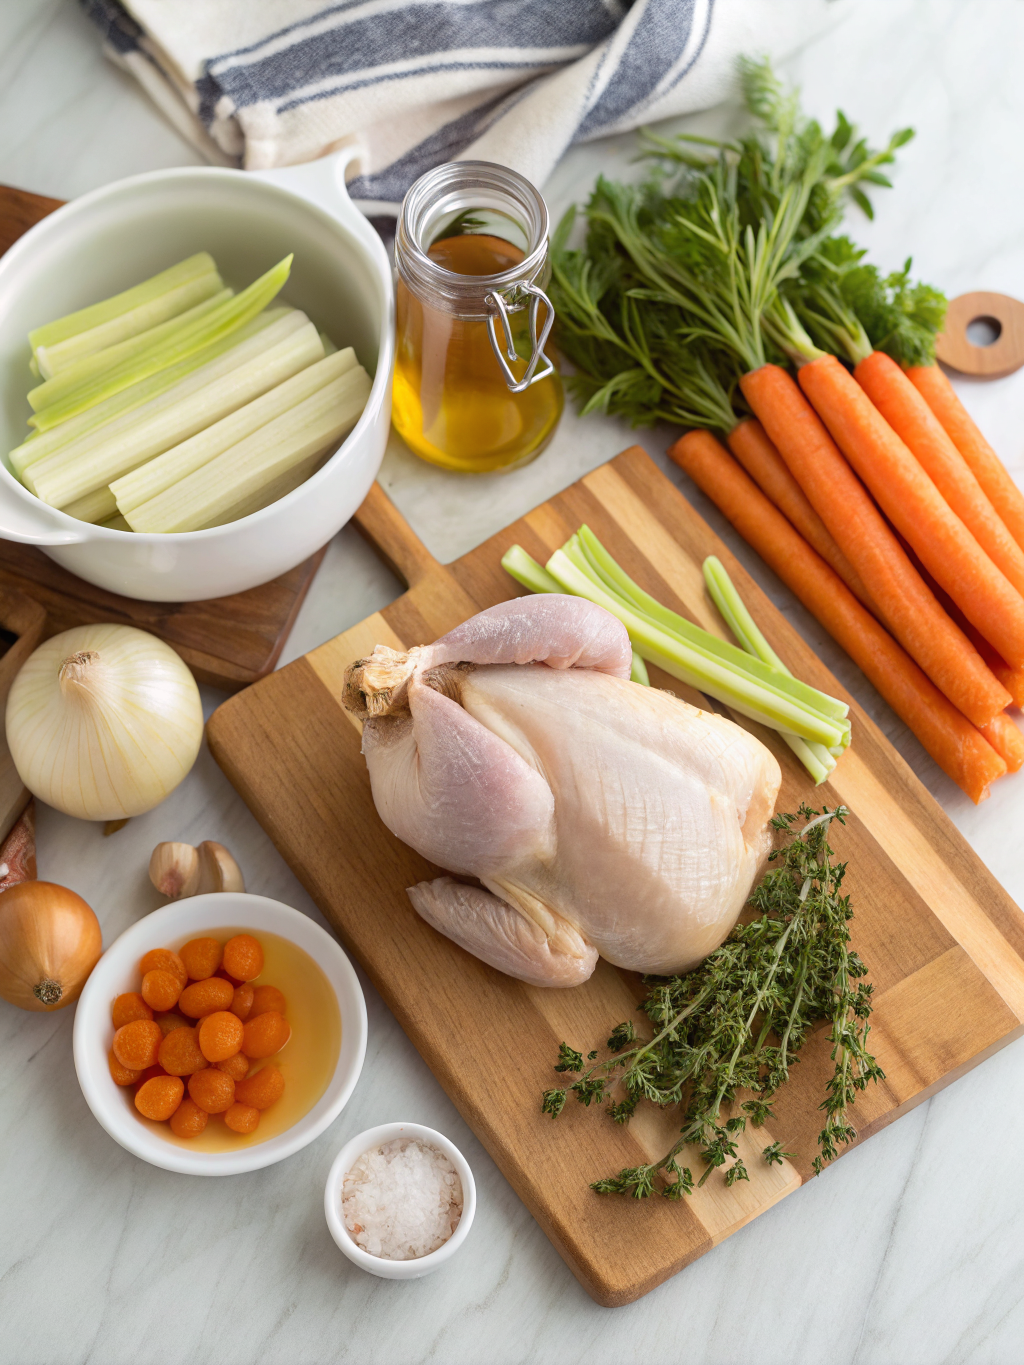
The beauty of homemade chicken broth lies in its simplicity and flexibility. Here’s what you’ll need to create a rich, flavorful base for countless recipes:
- 4 pounds chicken parts (carcass, backs, wings, or a whole chicken) – The collagen-rich parts yield the most flavor
- 2 large onions, quartered with skins (the skins add beautiful color)
- 4 large carrots, roughly chopped
- 4 celery stalks with leaves, roughly chopped
- 6 garlic cloves, smashed
- 2 bay leaves
- 1 tablespoon whole black peppercorns
- 1 tablespoon kosher salt (adjust to taste)
- 2 tablespoons apple cider vinegar (helps extract minerals from the bones)
- Fresh herbs (parsley, thyme, rosemary sprigs) – about a small handful total
- Cold water (enough to cover ingredients by 1 inch, approximately 4-5 quarts)
For substitutions: Leeks can replace onions for a milder flavor. No fresh herbs? Use 1 tablespoon each of dried herbs. Turkey parts work wonderfully as a chicken alternative. For a deeper flavor profile, roast the bones and vegetables before simmering.
Timing
Creating liquid gold requires patience, but the hands-on time is minimal:
Preparation Time: 15 minutes (mostly chopping vegetables and gathering ingredients)
Cooking Time: 3-4 hours for standard broth, up to 8 hours for bone broth (significantly less than traditional 24-hour methods while achieving 90% of the flavor extraction)
Total Time: Approximately 4 hours and 15 minutes
The beauty of this process is that while it takes time, it requires minimal attention—just an occasional check to skim impurities and ensure a gentle simmer.
Step-by-Step Instructions
Step 1: Prepare Your Ingredients
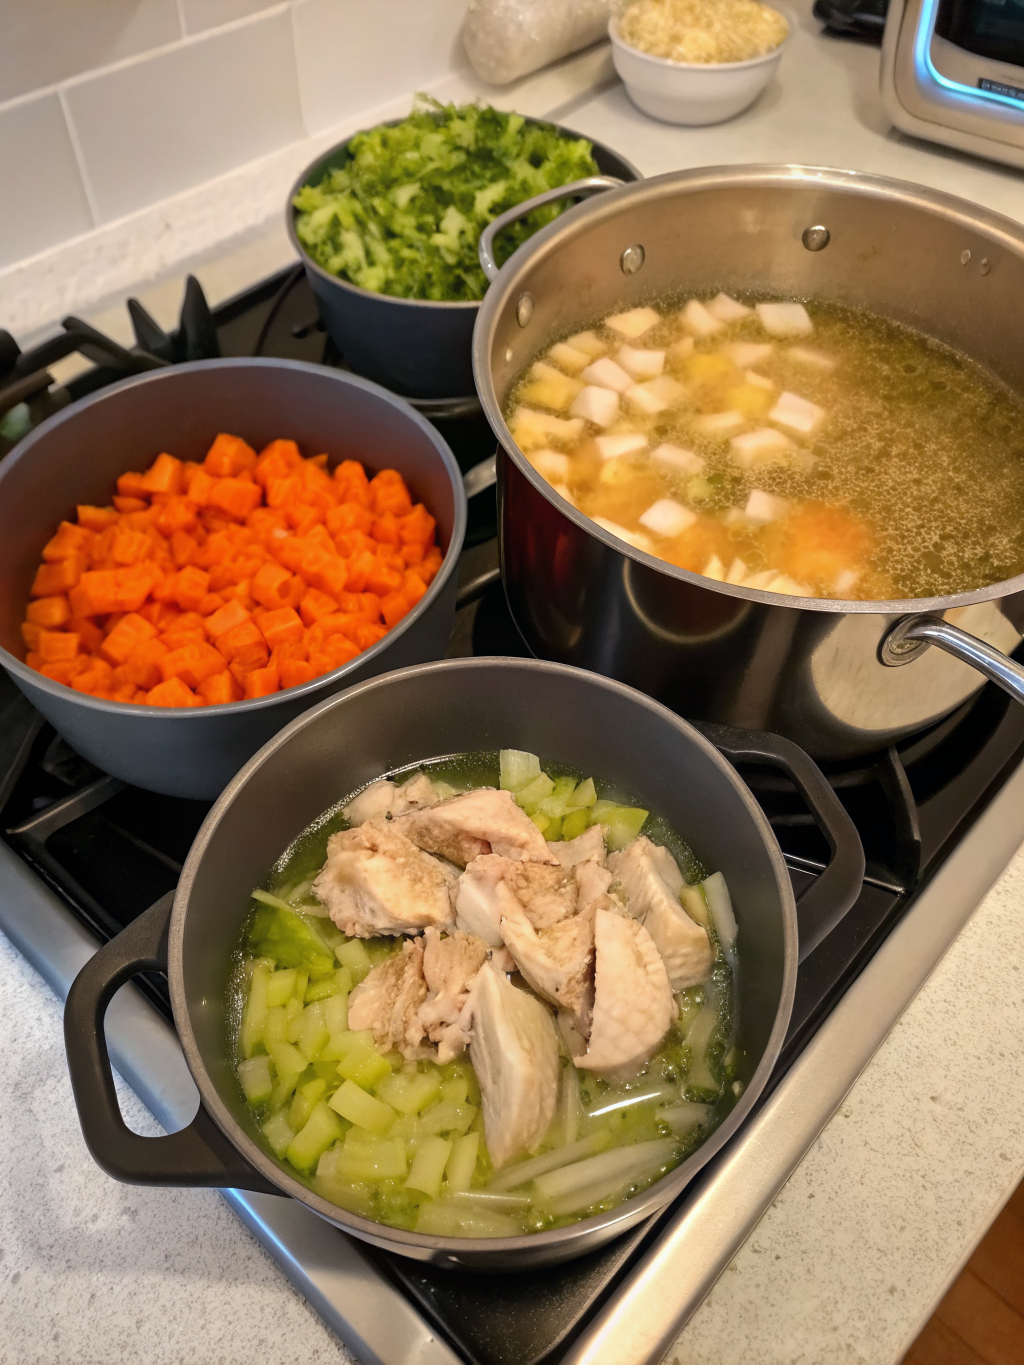
Rinse the chicken parts under cold water to remove any blood or impurities. Roughly chop your vegetables—no need for precision as they’ll be strained out later. The larger chunks prevent vegetables from disintegrating during the long cooking process.
Step 2: Combine Everything in a Large Pot
Place chicken parts in a large stockpot (at least 8-quart capacity). Add vegetables, herbs, peppercorns, salt, and apple cider vinegar. The vinegar is crucial as it helps draw minerals from the bones, creating a more nutritious broth.
Step 3: Add Cold Water
Cover ingredients with cold water by about 1 inch. Starting with cold water is essential—it allows proteins and impurities to be released slowly, resulting in clearer broth. Hot water can cause proteins to coagulate too quickly, trapping impurities in the broth.
Step 4: Bring to a Gentle Simmer
Place pot over medium-high heat and bring to just below boiling point. You’ll see small bubbles forming around the edges. Reduce heat immediately to maintain a gentle simmer—never let it reach a rolling boil, which can make your broth cloudy and give it a greasy mouthfeel.
Step 5: Skim and Simmer
During the first 30 minutes, foam and impurities will rise to the surface. Skim these off with a large spoon or fine-mesh skimmer. This step is crucial for achieving that crystal-clear broth restaurants are known for. Continue simmering uncovered or with lid slightly ajar for 3-4 hours.
Step 6: Strain the Broth
Line a large colander with cheesecloth and place over another large pot. Carefully strain the broth, capturing all solids. For ultra-clear broth, strain a second time through a fine-mesh sieve. Discard vegetables and herbs, but consider saving the chicken meat for other recipes.
Step 7: Cool Properly
Allow broth to cool slightly before transferring to storage containers. For rapid cooling (important for food safety), place the pot in an ice bath, stirring occasionally. Never place hot broth directly in the refrigerator, as this can raise the temperature of surrounding foods to unsafe levels.
Step 8: Remove Fat (Optional)
For a leaner broth, refrigerate overnight and remove the solidified fat layer from the top before using. However, some fat adds flavor and mouthfeel, so consider your recipe needs before removing it all.
Nutritional Information
Homemade chicken broth isn’t just delicious—it’s nutritionally superior to store-bought versions. A 1-cup serving of this homemade broth contains approximately:
• Calories: 86
• Protein: 6g (supports muscle repair and immune function)
• Fat: 3g (primarily beneficial fats from the chicken)
• Carbohydrates: 8g
• Sodium: 343mg (significantly less than commercial broths which average 860mg)
• Potassium: 252mg
• Calcium: 34mg
• Iron: 0.7mg
Studies show homemade broths contain up to 3 times more gelatin (collagen) than commercial versions. This collagen supports joint health and provides that satisfying mouthfeel that distinguishes restaurant-quality soups.
Healthier Alternatives for the Recipe
While this chicken broth recipe is already nutritious, here are some modifications to suit various dietary needs:
Lower Sodium Version: Omit salt during cooking and add to taste when using the broth in recipes. This reduces sodium by approximately 75% while maintaining flavor development.
Higher Protein Option: Add an extra pound of chicken feet (if available) to significantly increase protein and collagen content. This boosts the protein to approximately 9g per cup.
Anti-Inflammatory Focus: Add 2 inches of fresh ginger and 1 tablespoon of turmeric to the simmering broth. These ingredients contain compounds that have been shown to reduce inflammation markers in clinical studies.
Vegetable-Forward Version: Double the vegetables and add mushroom stems for an umami boost while reducing chicken by half. This creates a lighter broth with more phytonutrients.
Serving Suggestions
Your homemade chicken broth is incredibly versatile. Here are some inspired ways to use it:
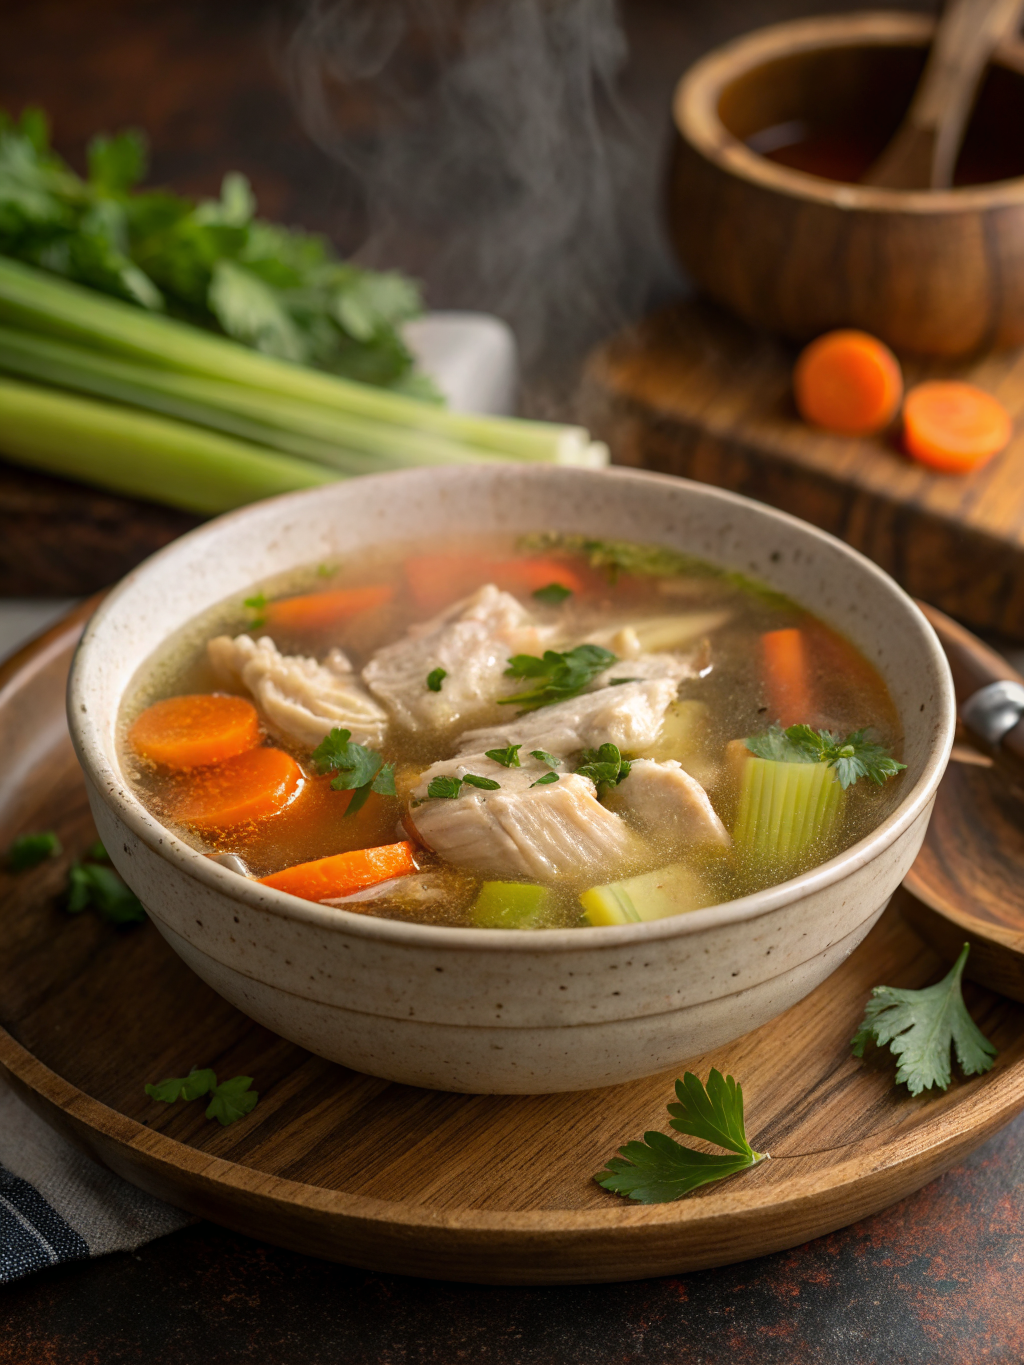
Classic Chicken Noodle Soup: Add shredded chicken, carrots, celery, and egg noodles for the ultimate comfort food. The clarity of homemade broth makes this simple soup extraordinary.
Risotto Base: Replace water with your broth when making risotto for an incredibly rich flavor profile. The gelatin content creates a silky texture impossible to achieve with boxed broth.
Braising Liquid: Use when slow-cooking tougher cuts of meat. The collagen in homemade broth helps break down connective tissues for tender results.
Grain Infusion: Cook quinoa, rice, or farro in broth instead of water. This simple swap adds approximately 6g of protein per cup of cooked grains.
Sipping Broth: Warm a cup of broth with a squeeze of lemon and fresh herbs for a nourishing, low-calorie snack that supports hydration and provides electrolytes.
Common Mistakes to Avoid
- Boiling Instead of Simmering: High heat breaks down proteins incorrectly, creating cloudy, greasy broth. Maintain a gentle simmer where bubbles barely break the surface.
- Not Skimming the Surface: The foam contains impurities that can make broth bitter. Skimming during the first 30 minutes removes these compounds.
- Using Too Many Vegetables: More isn’t always better. Excessive vegetables, especially cruciferous ones like broccoli or cabbage, can overpower the chicken flavor and add bitterness.
- Adding Salt Too Early: As broth reduces, it concentrates. Early salting can result in over-seasoned broth. Consider adding minimal salt during cooking and adjusting when using.
- Rushing the Process: At least 3 hours of simmering is needed to extract flavor and nutrients. Shortcuts result in thin, watery broth lacking depth.
Storing Tips for the Recipe
Proper storage ensures your broth maintains its quality and safety:
Refrigeration: Store in airtight containers for up to 5 days. The fat cap that forms on top actually helps preserve the broth by creating a seal that prevents oxidation.
Freezing: Freeze in various portion sizes for convenience. Ice cube trays work perfectly for small amounts needed in sauces (each cube equals approximately 2 tablespoons). For larger portions, use freezer-safe containers with 1/2 inch headspace to allow for expansion.
Pressure Canning: For shelf-stable storage, pressure can your broth following USDA guidelines (10 pounds pressure for 20 minutes for pints, 25 minutes for quarts). This method preserves broth for up to one year.
Reduction Method: For space-saving storage, reduce your broth by half through simmering. This concentrated version can be diluted when needed and takes up half the storage space.
Conclusion
Mastering this chicken broth recipe is truly a culinary game-changer. The difference between homemade and store-bought is immediately noticeable in everything from simple soups to complex sauces. Beyond flavor, you’re creating a nutritionally superior ingredient while practicing sustainable cooking by utilizing parts that might otherwise be discarded.
Have you tried making your own chicken broth? Share your experience in the comments below! Did you add any special ingredients or discover a unique use for your liquid gold? We’d love to hear how this fundamental recipe has enhanced your cooking adventures. Happy simmering!