Pillsbury Chicken Pot Pie Recipe: A Comforting Classic Made Easy
Have you ever wondered why homemade chicken pot pie seems so intimidating when it should be the ultimate comfort food? Many home cooks shy away from making this classic dish, assuming it requires culinary expertise and hours in the kitchen. But what if I told you that a delicious pillsbury chicken pot pie recipe could be on your dinner table with minimal effort?
Using Pillsbury refrigerated pie crusts as your secret weapon transforms this seemingly complex dish into an achievable weeknight dinner. The flaky, golden crust paired with a creamy chicken filling creates a meal that feels like a warm hug on a plate – perfect for busy families or anyone craving homestyle cooking without the fuss.
This pillsbury chicken pot pie recipe balances convenience with homemade flavor, giving you the best of both worlds. Let’s dive into how you can create this crowd-pleasing comfort food that will have everyone asking for seconds!
Ingredients List
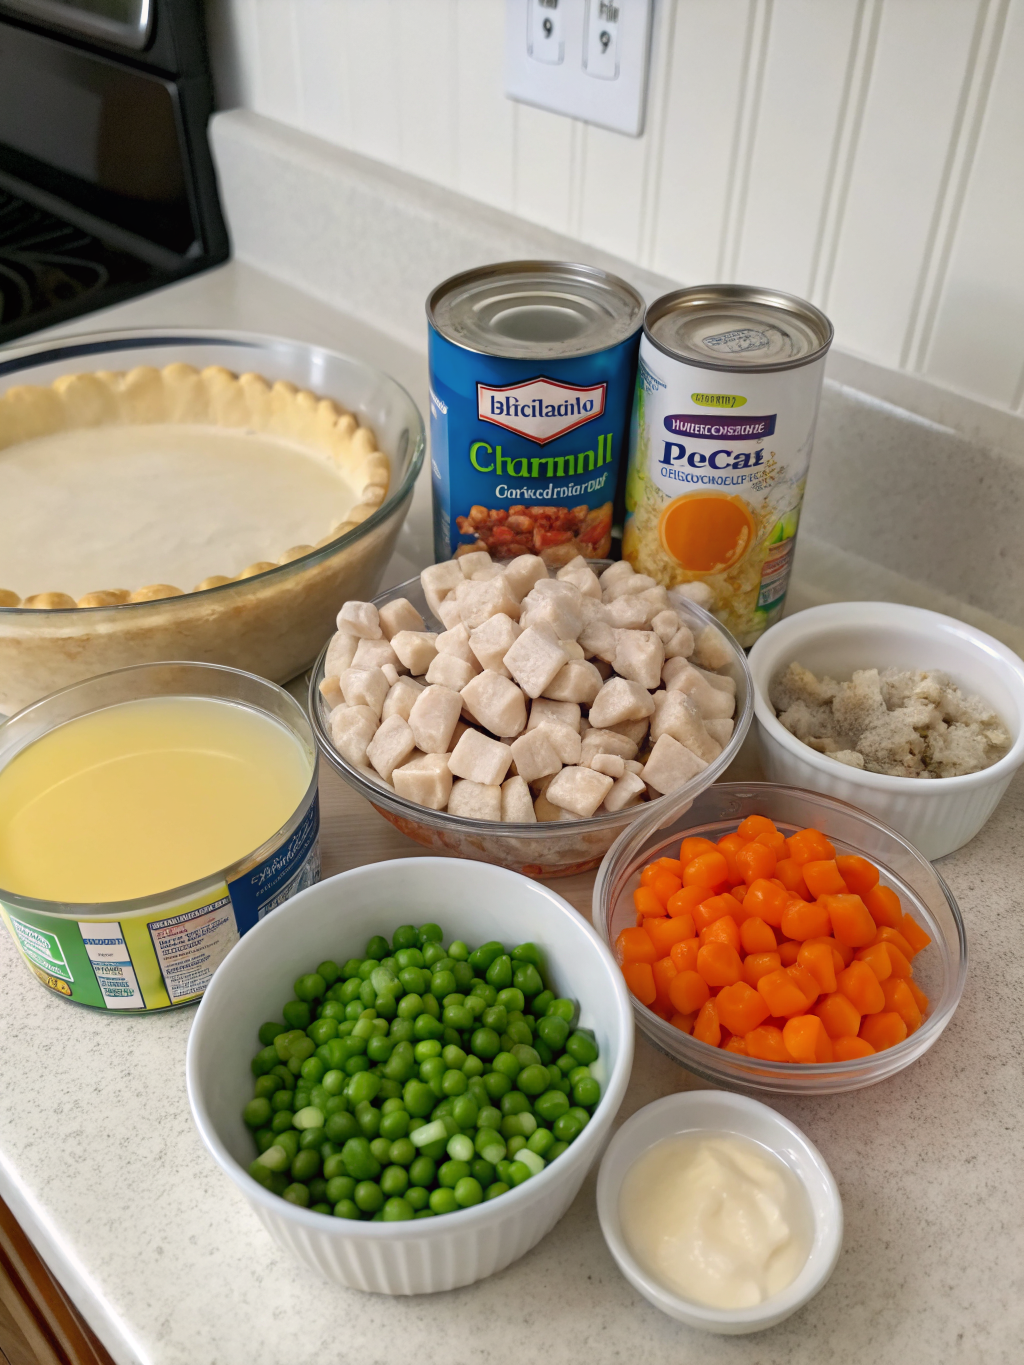
Gathering quality ingredients is the first step toward pot pie perfection. Here’s everything you’ll need to create this satisfying dish:
- 1 box (14.1 oz) Pillsbury refrigerated pie crusts (2 crusts)
- 1/3 cup butter or margarine
- 1/3 cup all-purpose flour
- 1/2 teaspoon salt
- 1/4 teaspoon black pepper
- 1/4 teaspoon dried thyme (optional)
- 1 3/4 cups chicken broth
- 1/2 cup milk
- 2 1/2 cups shredded cooked chicken (rotisserie chicken works wonderfully)
- 2 cups frozen mixed vegetables (carrots, peas, green beans, corn), thawed
- 1 small onion, finely chopped (about 1/3 cup)
- 1 egg, beaten (for egg wash)
Substitution options: Use turkey instead of chicken for a post-holiday variation. Dairy-free? Substitute the butter with olive oil and the milk with unsweetened almond milk. For a vegetarian version, replace the chicken with 2 cups of sautéed mushrooms and use vegetable broth instead of chicken broth.
Timing
Preparation time: 20 minutes
Cooking time: 35-40 minutes
Total time: Approximately 1 hour
This pillsbury chicken pot pie recipe takes 30% less time than traditional homemade pot pies that require making crust from scratch. The convenience of pre-made pie crusts saves you about 45 minutes of prep work while still delivering that homemade taste your family craves.
Step-by-Step Instructions
Follow these detailed steps to create a perfect chicken pot pie every time:
Step 1: Prepare Your Workspace
Preheat your oven to 425°F. Remove the Pillsbury pie crusts from the refrigerator and allow them to come to room temperature for about 15 minutes. This makes them easier to handle and prevents cracking when you unroll them.
Step 2: Create the Filling Base
In a large saucepan, melt the butter over medium heat. Add the chopped onion and cook until translucent, about 3 minutes. Sprinkle the flour, salt, pepper, and thyme over the butter-onion mixture, stirring constantly for 1-2 minutes to create a roux. This step is crucial for thickening your filling and preventing a runny pot pie.
Step 3: Develop the Creamy Sauce
Gradually stir in the chicken broth and milk, continuing to stir constantly. Cook over medium heat, stirring frequently, until the mixture thickens and bubbles, about 5-7 minutes. The sauce should coat the back of a spoon when ready.
Step 4: Complete the Filling
Add the shredded chicken and thawed vegetables to the sauce. Stir gently to combine all ingredients and ensure even coating. Remove from heat and allow the mixture to cool slightly while you prepare the crusts.
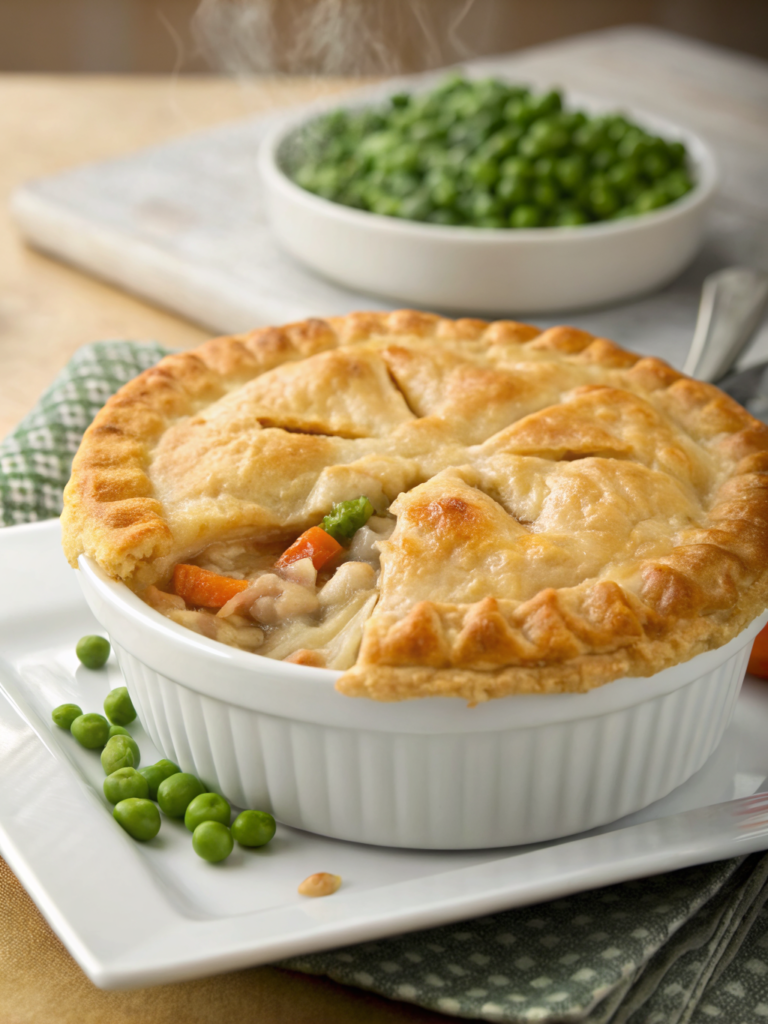
Step 5: Assemble the Pot Pie
Unroll one pie crust and place it in a 9-inch pie plate, pressing firmly against the bottom and sides. Pour the chicken filling into the crust-lined pie plate, being careful not to overflow. Unroll the second crust and place it over the filling.
Step 6: Seal and Decorate
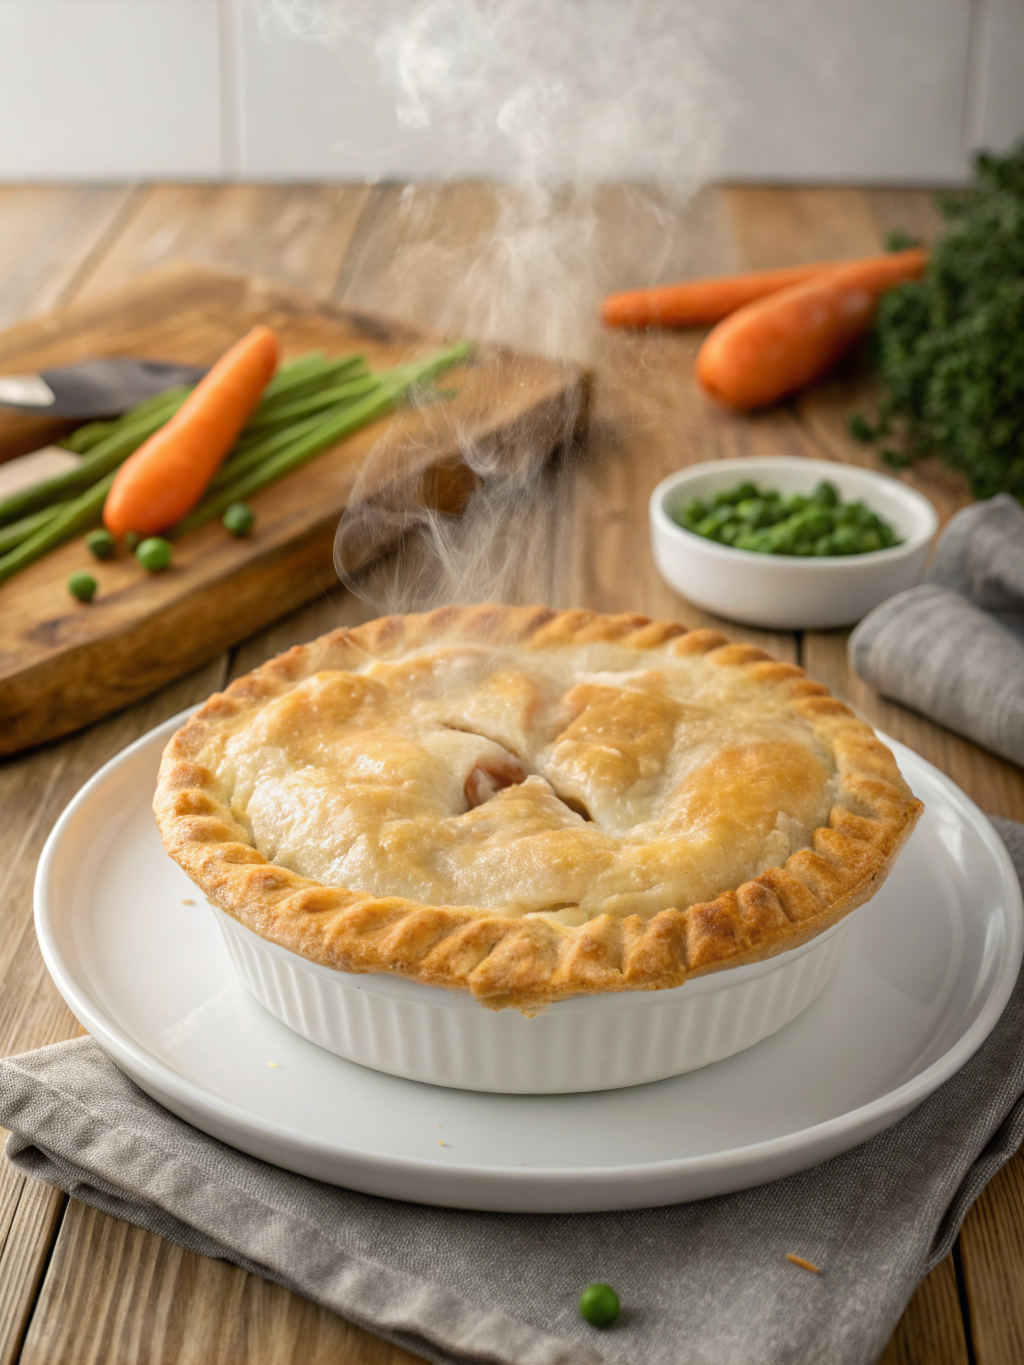
Trim any excess crust hanging over the edge, then seal the edges by pressing the top and bottom crusts together. Crimp the edges with a fork or your fingers for a decorative finish. Cut 3-4 slits in the top crust to allow steam to escape during baking. For an attractive golden finish, brush the top crust with beaten egg.
Step 7: Bake to Golden Perfection
Place the pie on a baking sheet (to catch any potential overflow) and bake in the preheated oven for 30-35 minutes, or until the crust is golden brown. If the edges begin to brown too quickly, cover them with strips of aluminum foil.
Step 8: Rest and Serve
Allow the pot pie to rest for 10 minutes before serving. This crucial step helps the filling set and makes it easier to slice clean portions. Use a sharp knife to cut into wedges and serve warm.
Nutritional Information
Understanding the nutritional content helps you make informed choices about this comfort food classic:
Per serving (1/6 of pie):
Calories: 425
Total Fat: 24g
Saturated Fat: 10g
Cholesterol: 85mg
Sodium: 720mg
Total Carbohydrates: 32g
Dietary Fiber: 2g
Sugars: 3g
Protein: 18g
This pillsbury chicken pot pie recipe provides approximately 25% of your daily protein needs and significant amounts of vitamins A and C from the vegetable mixture. The dish delivers a balanced combination of protein, carbohydrates, and fats, making it a satisfying main course.
Healthier Alternatives for the Recipe
Looking to lighten up this classic comfort food? Try these modifications:
For reduced calories and fat, use just one pie crust on top and create a “pot pie casserole” by placing the filling in a baking dish. This cuts about 120 calories and 7g of fat per serving while maintaining the satisfying top crust.
Boost the vegetable content by adding an extra cup of vegetables and reducing the chicken to 2 cups. This increases fiber while reducing calories. Consider adding chopped spinach or kale for additional nutrients.
For a lower-sodium version, use low-sodium broth and add fresh herbs like rosemary, sage, or parsley to enhance flavor without extra salt. This can reduce sodium content by approximately 200mg per serving.
Try whole wheat Pillsbury crusts if available, or look for other whole grain pre-made crusts to increase the fiber content and add more complex carbohydrates to the meal.
Serving Suggestions
Elevate your chicken pot pie experience with these complementary sides and presentation ideas:
Pair with a crisp green salad dressed with a light vinaigrette to balance the richness of the pie. The acidity cuts through the creamy filling beautifully.
For a special touch, serve individual portions in ramekins using the same recipe but with smaller crusts cut to fit. This creates an impressive presentation for dinner guests.
During fall and winter months, roasted root vegetables like carrots, parsnips, or sweet potatoes make excellent accompaniments, enhancing the comfort food appeal.
For a complete meal that pleases everyone, offer cranberry sauce on the side – the sweet-tart flavor provides a wonderful contrast to the savory pie, similar to a holiday dinner.
Pillsbury Chicken Pot Pie: A Family-Friendly Meal Everyone Will Love
Common Mistakes to Avoid
- Overfilling the pie: This leads to bubbling over and soggy bottom crusts. Leave at least 1/2 inch of space below the top crust.
- Skipping the resting period: Cutting into the pie immediately after baking results in a runny filling. The 10-minute rest is essential for proper setting.
- Not thawing frozen vegetables: Frozen vegetables release excess water during cooking, potentially making your filling watery. Always thaw and drain them first.
- Forgetting steam vents: Without slits in the top crust, steam gets trapped and can make the crust soggy instead of flaky.
- Using cold pie crusts: Refrigerated crusts need to warm slightly before unrolling to prevent cracking. Data shows that 15 minutes at room temperature is optimal.
Storing Tips for the Recipe
Make the most of your chicken pot pie with these storage and preparation strategies:
Refrigerate leftover pot pie, covered with foil or in an airtight container, for up to 3-4 days. For best results when reheating, use an oven preheated to 350°F for 15-20 minutes rather than a microwave, which can make the crust soggy.
Freeze unbaked pot pies for convenient future meals. Assemble the pie completely but don’t add the egg wash. Wrap tightly in plastic wrap followed by aluminum foil and freeze for up to 3 months. When ready to cook, brush with egg wash and bake from frozen, adding 15-20 minutes to the baking time.
For meal prep convenience, prepare the filling up to 2 days ahead and store in the refrigerator. When ready to bake, simply assemble with the crusts and continue with the recipe. This cuts active preparation time on cooking day to just 10 minutes.
Conclusion
This Pillsbury chicken pot pie recipe proves that homestyle comfort food doesn’t have to be complicated or time-consuming. By combining convenient pre-made crusts with a flavorful homemade filling, you get the best of both worlds – the taste of scratch cooking with a fraction of the effort.
Whether you’re feeding a family on a busy weeknight or looking to impress weekend dinner guests, this versatile recipe delivers consistently delicious results. The golden, flaky crust and creamy, savory filling create a satisfying meal that feels like home on a plate.
Have you tried this recipe? I’d love to hear how it turned out! Share your experiences, modifications, or serving suggestions in the comments below. And if you enjoyed this comfort food classic, don’t forget to check out our other simple yet delicious family dinner ideas!